외국사이트에서 퍼온 인형 도색법
작은 스케일 인형 페인팅
by Christian Jakl, photos taken by Wolfram Bradac
 Right from the start, small figure painting has nothing to do with standard figure painting. In order to produce those fantastic figures we see in dioramas at model shows we have to use different painting techniques. A few tricks are all it takes to get good results. Many aircraft modelers are afraid to do dioramas because they do not feel comfortable with small scale figure painting. Some argue that they do not have a steady hand others claim that their figures do not look realistic enough. In this article we shall show you how figures can easily be painted with minimum effort and still give excellent results.
![]() Preparation:
Preparation:
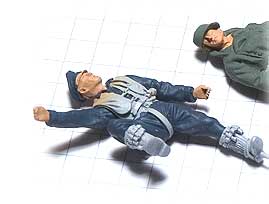
Body posture is determined by the role the figure plays in the diorama. Once assembled, filled and sanded, painting can begin. The surfaces of resin figures are covered by a greasy film that has its origin in the production process. This film is brushed into the mould in order to make the removal of the figure easier. A little cleaning with nitro thinner or thinned acetone will do the trick. Do not submerge the figure into these thinners for any length of time as they will deform the figure. In order to hold the figure during the entire painting process, a hole is drilled into the sole of the shoe and a copper wire glued into this hole. This not only makes it easier to paint the figure but it also facilitates the mounting of figure to the base.
![]() Undercoating (Primer coat):
Undercoating (Primer coat):
It is necessary to apply a primer coat in order to have better adherence of the paint. Priming with Gunze Mr.Surfacer 1000 has another good side effect because it brings out the details with its light gray flat surface and therefore makes painting easier. Various imperfections on the figure also become more noticeable, normally hidden by the glossy surface of the resin. This Gunze product can be applied with your airbrush and takes about 15 minutes to dry. Any mistakes can then be sanded.
![]()
![]()
![]()
![]()
![]()
Preparation, Undercoating, Skin Color ...
![]()
![]()
![]()
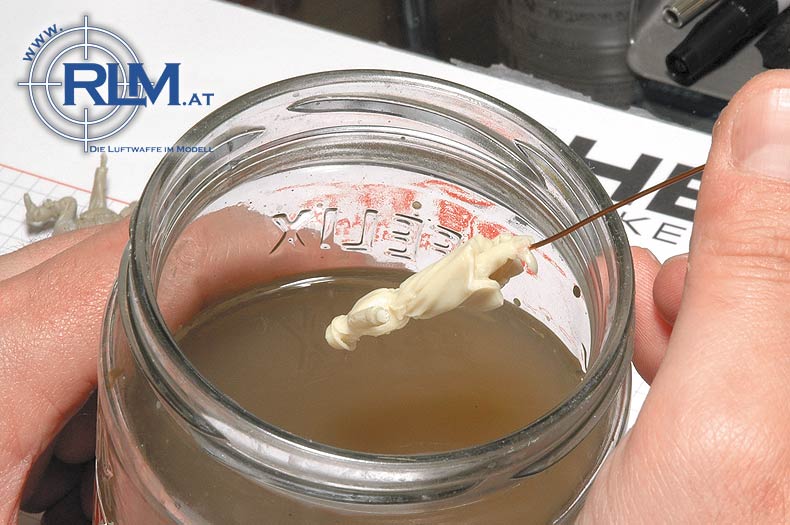
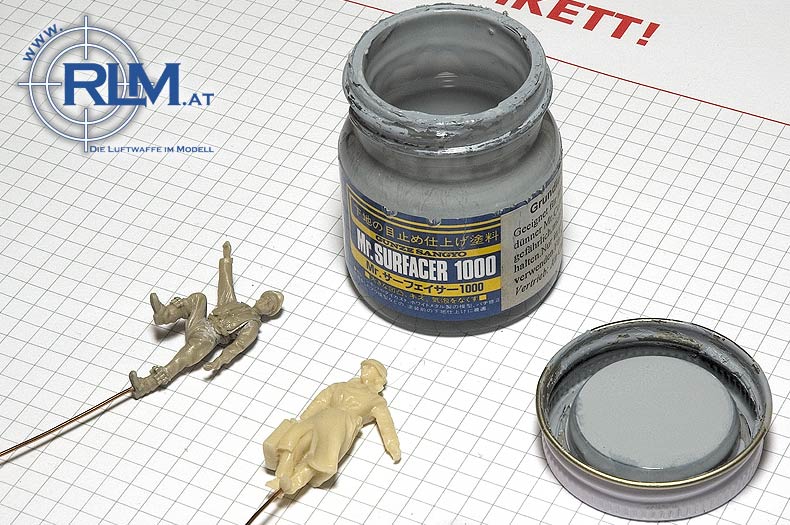
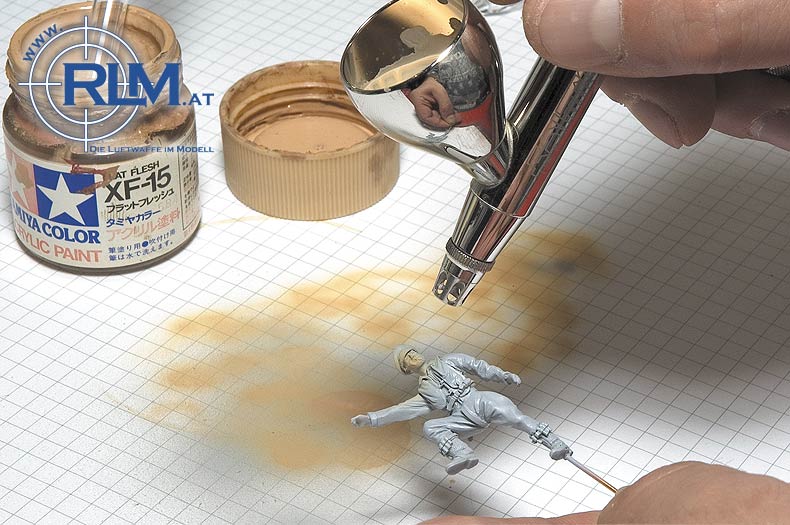
Image 1: Preparation ... Image 2: Undercoating ... Image 3: Skin Color ...
![]()
![]()
![]() Skin Color:
Skin Color:
In order not to lose any contour details by using a brush, I apply the skin color with the airbrush. The skin colors produced by the paint manufacturers are for the most part too "clean". They are closer to the color of pink pigs. That is why I darken Tamyia XF-15 Flesh with a little dark brown. At this point one must use judgment how dark or light the skin tone has to be. During this phase only the base skin color is applied; no highlights and shadows yet.
![]() Choice of Colors:
Choice of Colors:
He who believes that his own incompetence or lack of talent is responsible for poor results could be very much mistaken. The paints or rather the type of paint is usually to blame. The best results at brush painting are achieved with Andrea or Vallejo paints. Both manufacturers have produced excellent acrylics that cover well. Andrea colors dry matt, the matter how one applies them. Vallejo colors dry a bit oily and semi-glossy if one applies them in a thick coat. They do have quite a few uniform colors in their assortment however. Both paints may be mixed.
![]() Base Colors:
Base Colors:
The first step is to cover the large areas. Here the colors should not be thinned or lightened. Parts of the figure that will receive a different color are ignored at this stage. You should work carefully and cleanly right from the start. Mistakes can still be corrected.
![]() Highlighting:
Highlighting:
In order to make the fabric look realistic we need to use dry brushing techniques. Here the advantages of using these two brands of paint come to the fore. The base color is lightened by adding white or light gray. Not too many materials are needed here, a tooth pick and a firm base. The degree of highlighting depends on darkness of the base color, but can be tried out without problems on the figure.
![]()
![]()
![]()
![]()
![]()
Choice of Colors, Base Colors, Highlighting ...
![]()
![]()
![]()
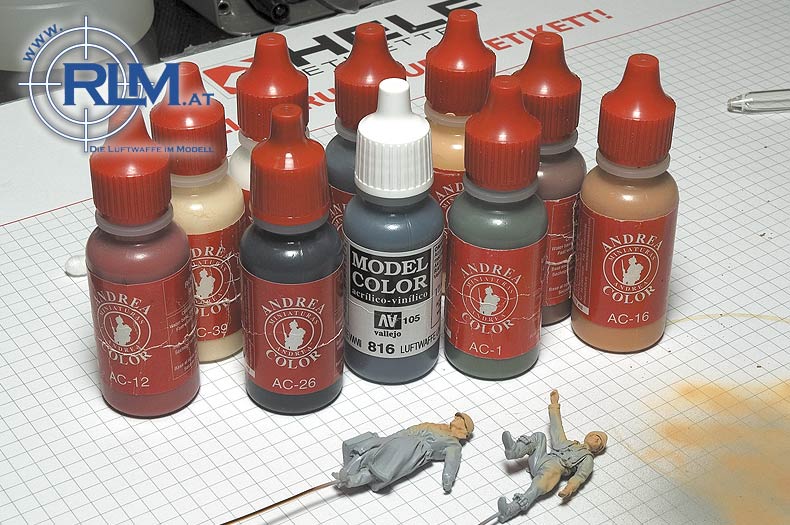
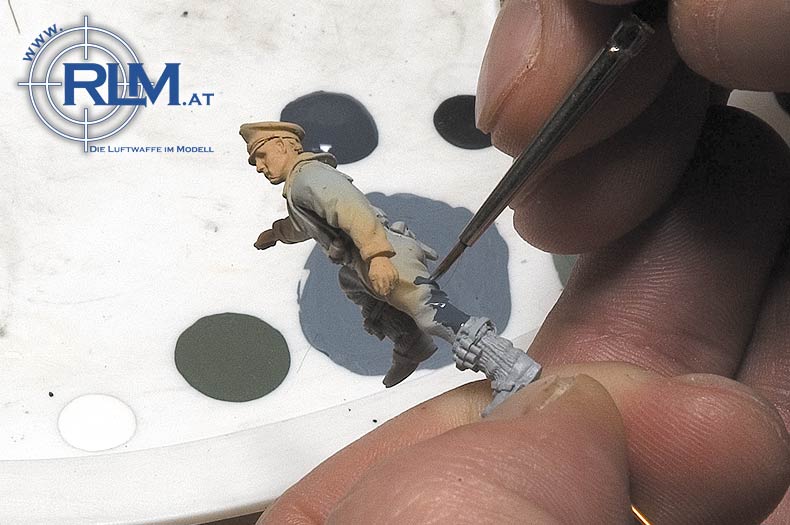
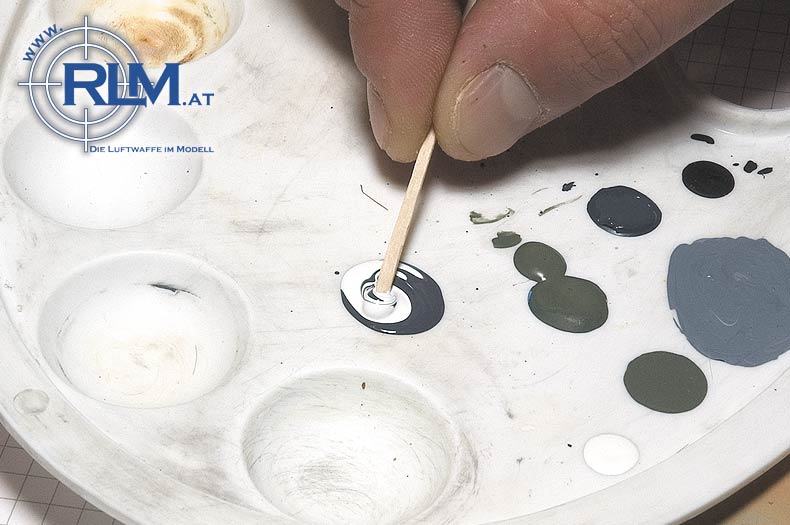
Image 4: Choice of Colors... Image 5: Base Colors ... Image 6: Highlighting ...
![]()
![]()
![]() Dry brushing:
Dry brushing:
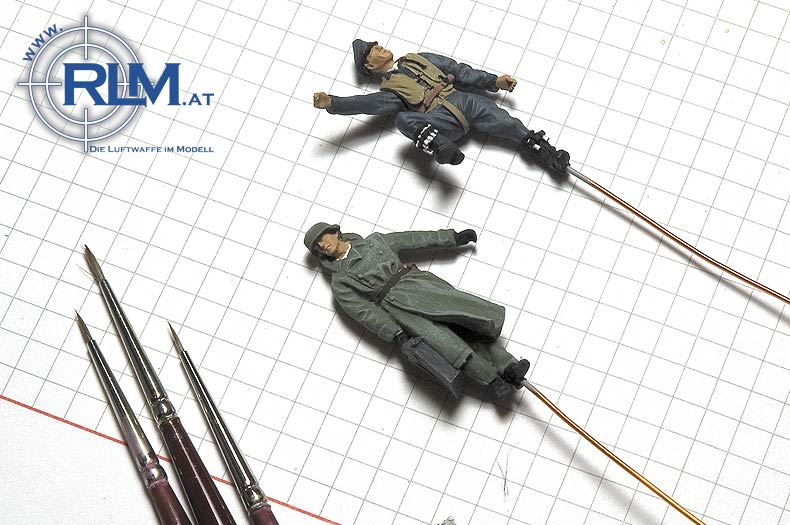
Take a soft good quality brush and tip it into the paint. Then take a cloth and wipe the paint from the brush until only a little pigment is left on it. These pigments will now be dragged over the elevated detail of the figure. This process should be more of a rubbing process. Do not touch the dry brushed parts with your fingers because the paint comes off easily. If time is available let the figures dry overnight. If there is too much paint on the brush you will notice unsightly blotches on the figure. These can be removed with a finger immediately.
![]() Details:
Details:
All areas of the figure should be painted according to the principles set forth above. No expense should be spared to purchase good quality brushes. Fine details are best painted with these high quality brushes. It makes the job easier. Use lighter and paler color tones. Strong colors make the small figures appear too obtrusive in the diorama setting. For instance use Anthracite rather than black or light yellow rather than yellow. If you have a magnifying glass by all means use it.
![]() Oil Colors:
Oil Colors:
Once the figure is finished let it dry thoroughly. Since various paints are susceptible to interact with oil paint thinners it could happen that your paint job may be destroyed. In order to accentuate the indentations of the figure, a highly thinned mixture of black oil paint should be dabbed into these recesses. The oil paint will find its own path. For skin color a brown color tone such as umbra, sienna, or ochre should be used. When the oil painting step is completed the figure should not be touched for at least two hours. The oil color sets and the figure can have color residue removed with a soft cloth. The oil color then remains only in the areas where the cloth cannot reach. Finally the figure gets a matt finish.
![]()
![]()
![]()
![]()
![]()
Dry brushing, Details, Oil Colors...
![]()
![]()
![]()
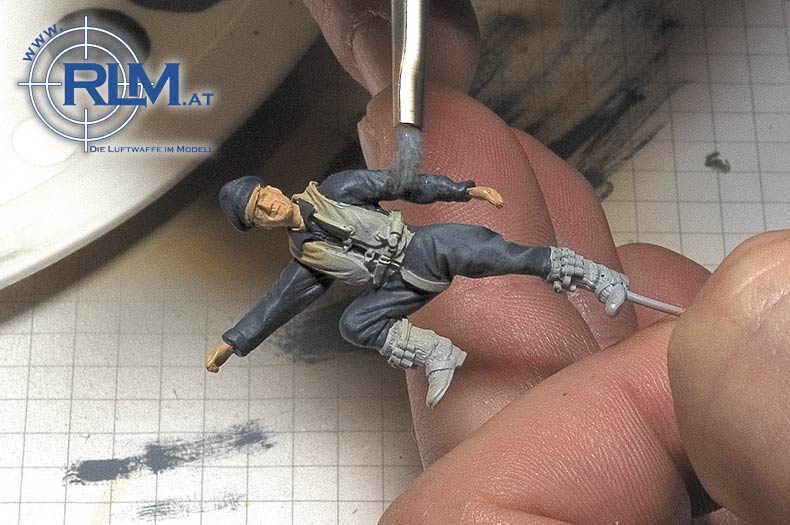
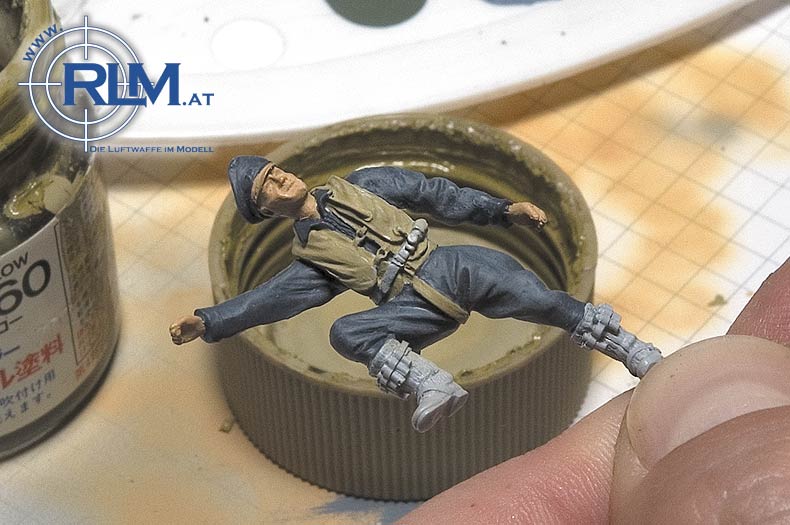
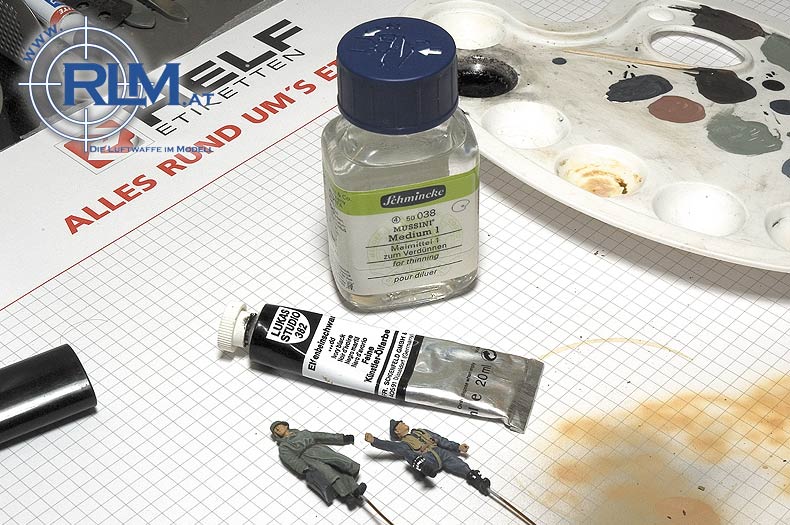
Image 7: Dry brushing ... Image 8: Details ... Image 9: Oil Colors ...
![]()
![]()
![]() Finish:
Finish:
Finally small details are painted such as buttons, insignia, belt buckles etc. For the face I reach for a very light Andrea skin tone. I then dry brush, nose, ears and cheekbones. With a black colored pencil I dot the eyes. I would not attempt more in this scale since any attempt to paint black and white would not look very realistic.
![]() Conclusions:
Conclusions:
Because of the dark and light painting method of individual parts of the figure a three dimensional illusion is created for the eye. Facial features are hinted at but any exaggeration does not harm the overall effect of the figure. The matt coat only reinforces the effect. The figure is present in the diorama but does not appear too obtrusive as it blends into the background.
![]()
![]()
![]()
![]()
![]()
![]()
![]()
![]()
![]()
![]()
![]()
![]()
![]()
![]()
meet the author
Christian Jakl
I live with my charming wife and daughter on the outskirts of Vienna. I was born in 1971 and studied to be a typographical engineer. Since childhood I have always been interested in modeling. From model ships and cars I have gradually shifted to aircraft models of WW II. with a heavy emphasis on the German Luftwaffe. My real interest however is in the creation of dioramas in 1/48 scale. I enjoy the scratch building and can let my creative energies come to the fore. I have devoted my time to thedeveloping of new techniques; to enhance model kits with added accessories and above all to try out new tools to get better results.
The learning curve is constant. I am never satisfied and am constantly trying to make models as lifelike as possible. The only problem is the time factor. There is never enough of it as you all well know. I hope you enjoy these webpages and I would like to have you critique my work in a constructive manner.

Email: ![]() christian.jakl@oeamtc.at
christian.jakl@oeamtc.at
![]()
![]()